Introduction
Please note: at the end of this document, we discuss a confusing error message you may encounter in PHD2 and how to solve it. We will also address any issues you may encounter when upgrading your PHD2.
What version of PHD2 you should use?
Most software developers recommend that you use the stable release of their software; PHD2 is one of these rare exceptions. When you visit PHD2's download page, at the time of this writing, there is a notice indicating:
We recommend running the latest development snapshot build to get the latest bug fixes and enhancements. The development builds are updated more frequently than the general releases below.
This notice may be removed at any time. Therefore, you should check before downloading a version of PHD2.
If you have downloaded PHD2 v2.6.13dev6 or newer, you will be able to use the native integration of our SDK, which is faster and more flexible than the ASCOM platform.
How do you connect to PHD2?
There are two methods for connecting the OGMA guide cameras to PHD2:
Using the native integration (recommended)
Using the OGMA ASCOM driver
1- Connect using the native integration (recommended)
OGMA AP Series has been fully integrated with PHD2 since v2.6.13dev3 from 21 April 2024. This means you don't have to download or install our ASCOM driver to use the camera with PHD2.
Once you have installed v2.6.13dev3 or newer, open PHD2 and select your camera as follows:
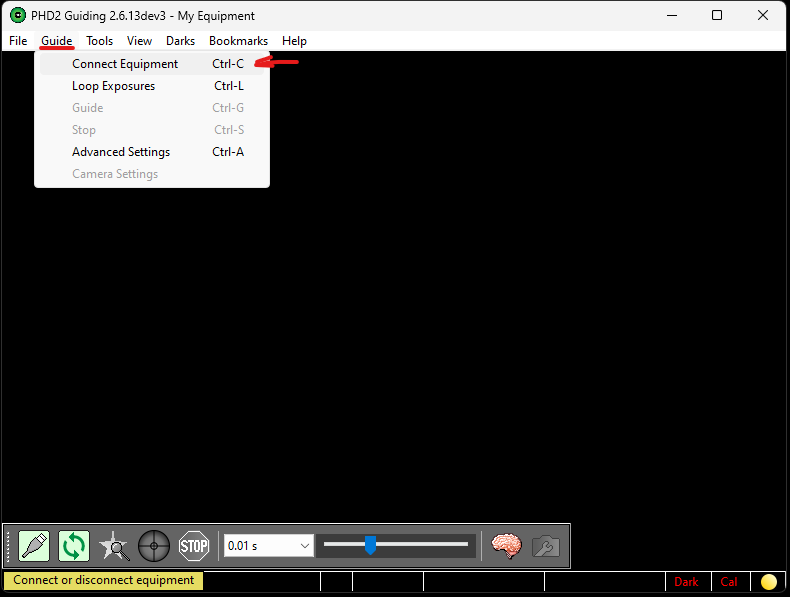
1- Click Guied > Connect Equipment
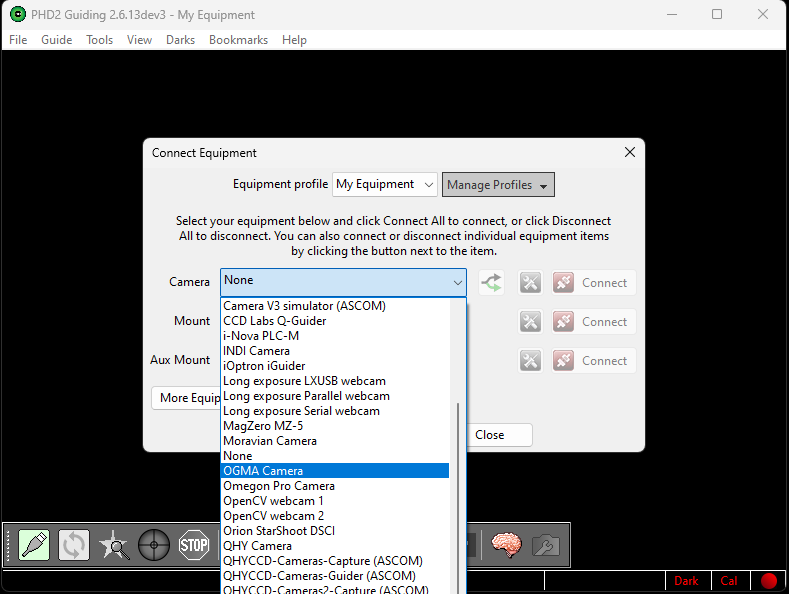
2 - Click Camera > OGMA Camera (Do not select the ASCOM OGMAVision Camera because it is slower).
3 - Click the button with the arrows near OGMA Cameras
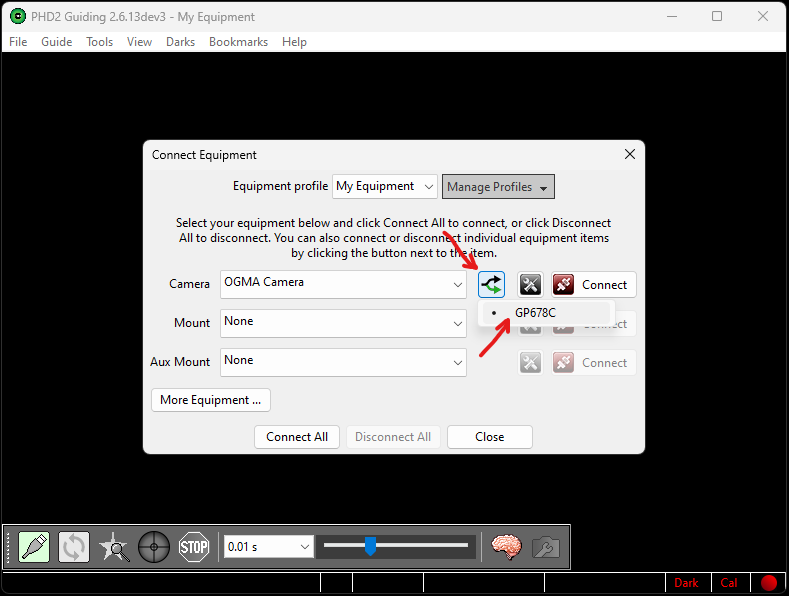
4- Finally, click the "Connect" button with the red icon.
At this point, you should have your GP camera connected natively.
2- Connect using the ASCOM driver
If you can't download a version of PHD2 newer than v2.6.13dev3 from 21 April 2024, or if you're using a new camera model that has just been released and hasn't been integrated natively yet, then you should use the latest OGMA ASCOM driver to establish the connection in PHD2.
To do so, follow these steps:
1- Download and install the latest OGMA ASCOM driver.
2- Open PHD2 and click Guide > Connect Equipment.

3- Click the Camera drop-down and select ASCOM OGAMVision Camera.
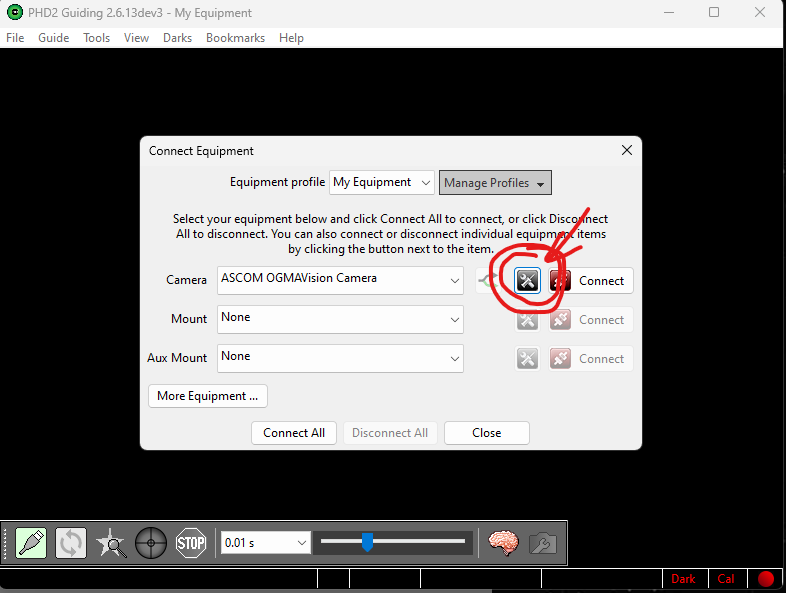
4- Then click the Tools button to the right of the camera drop-down.
5- The ASCOM setup window will open.
6- Use the drop-down to select the right camera. This is very important!

7- Click OK, and click the "Connect" button with the red icon.
At this point, you should have your GP camera connected through the ACOM driver.
Confusing error message in PHD2
When using PHD2 with multiple cameras from the same brand connected to your computer, the software may automatically select the first camera it detects based on alphabetical order. This can lead to a confusing error message.
For example, after selecting the OGMA native or ASCOM driver, if you have both an AP26MC camera and a GP678C camera from OGMA connected, PHD2 will default to the AP26MC because its model name starts with an "A", which comes first alphabetically. If this AP26MC camera is already being used by another software like NINA, APT, or through an ASCOM connection, PHD2 will display an error message stating, "This camera is already in use."
The confusion arises because the error message doesn't specify which camera is in use. Instead, it refers to "This camera" as the one PHD2 is attempting to connect to by default, not necessarily the one you intended to use.
To resolve this, manually select your desired camera in PHD2. Click the "Tools" button near the camera selection drop-down menu to choose the specific camera you want to connect to, bypassing the automatic internal selection that PHD2 is trying to make.
Possible issue after upgrading PHD2
PHD2's development builds receive updates more frequently than the stable release versions. As such, it's advisable to check for and install the latest builds regularly.
If you switch from a stable build to a development snapshot, there may be a scenario in which the previous version of PHD2 might still be running in the background. If you attempt to open the new version while the old one is active, the new version won't launch. To resolve this, close or kill the currently running version before installing and opening another.